Background #
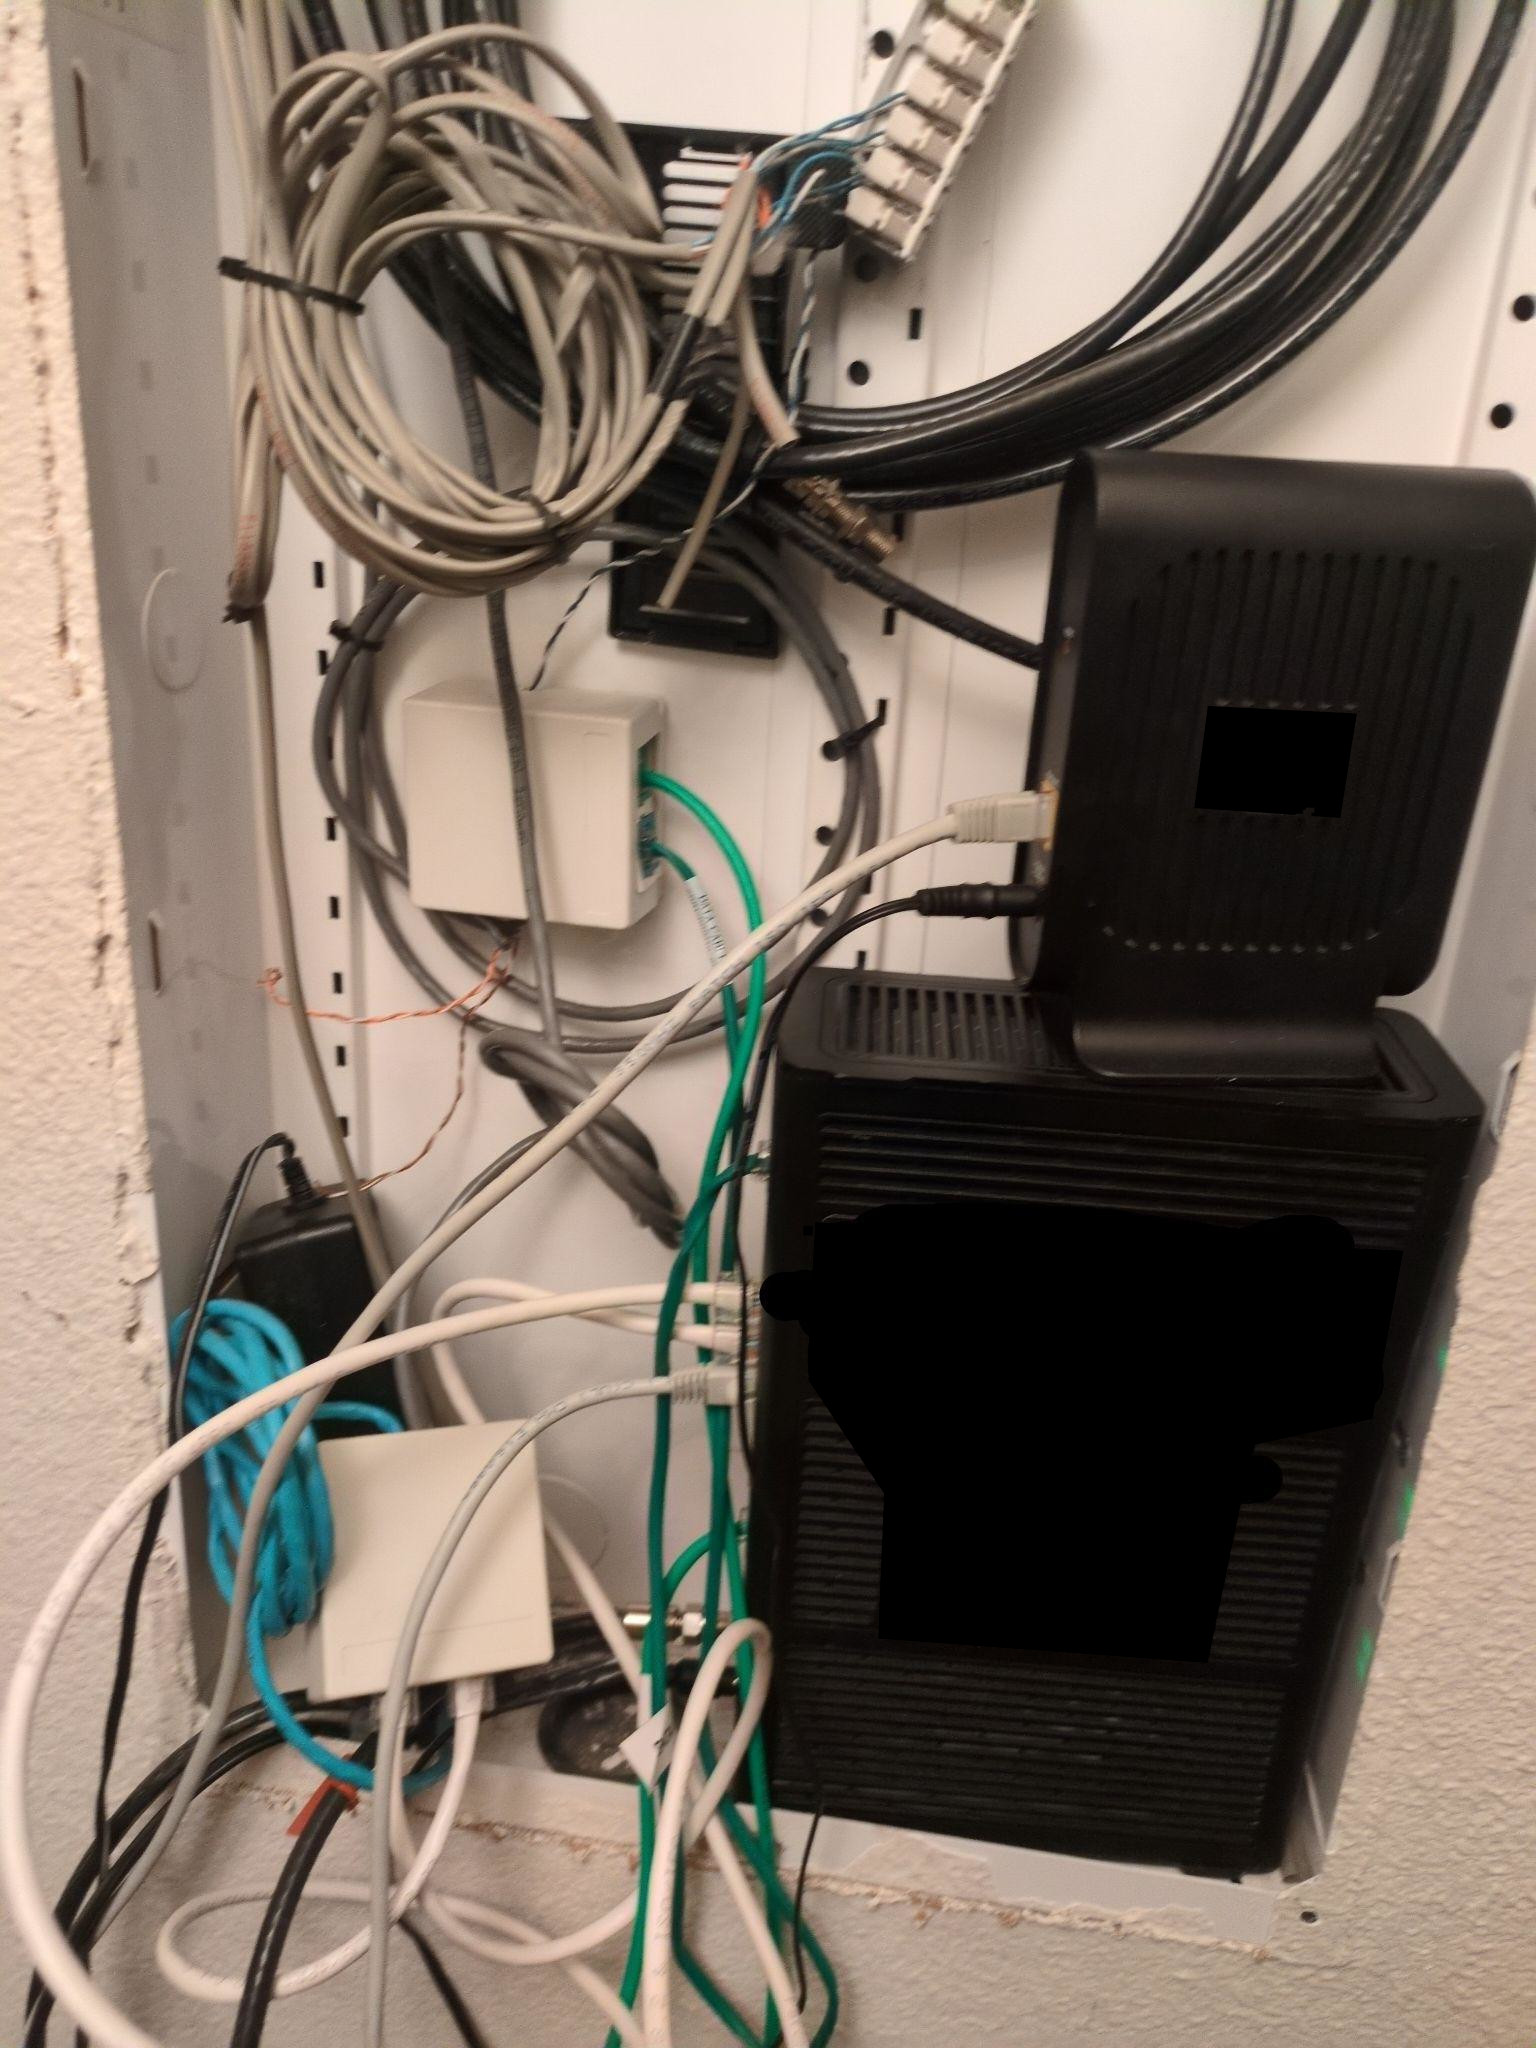
I had just returned home and saw a familiar sight in the shoe closet: an old DSL modem/router combo with an access point stacked on top of it. While it may have provided a blazing-fast 100 Mbps download and 2 Mbps upload in its’ heydey, in 2025 AD, it struggles to break 50 Mbps down. Even with a WiFi range extender, it maxed out at 12 Mbps down and 1 Mbps up in dead zones. And just hope that nobody uses the microwave, because then the router grinds to a halt—if it doesn’t crash altogether.
While I cherish the memories of PlanetSide 2 crashing the modem—a more common phenomenon than you may think—it was high time for an upgrade.
There were some conditions that my parents wanted met:
- They would have to be able to troubleshoot the internet if I wasn’t home.
- They would need to keep a home phone.
- They wanted to keep cable TV channels.
Internet Service Provider (ISP) #
Before you can really do anything, you need an internet service provider (ISP). Unfortunately, fiber optic rollout has been quite slow, and the national broadband map confirmed it wasn’t available in our area—but cable was.
While not ideal, it was the best of all the options. The top cable provider was Comcast. Given their history with device rentals and other funny business, I decided it would be best for us to own our own networking hardware.
We signed up for the 1 Gig plan.
Modem #

When it comes to modems, it can be pretty tricky to decide which one to get. While brands can carry board reputations, it really comes down to the model itself, combined with whatever speeds you’re looking for. Whatever we bought, we’d make sure to keep the receipt to prove ownership.
NETGEAR modems had come recommended by some friends, so I decided I’d get them a shot, but no matter how much I tried, they wouldn’t sync with Comcast’s network. I tried this with two different models.
Comcast’s first party modems are made by Arris, so I tried their models next. First I tried the ARRIS SURFboard SB8200, but despite its claimed supported speeds, it proved to be a tremendous bottleneck.
The ARRIS SURFboard G36 ended up working the best. The speeds ended up being about 10-15% faster than that of the stock Xfinity modem/router. Since I planned on setting up a router downstream, I set the modem into bridge mode to disable its routing and WiFi capabilities.
Router #

Thankfully, choosing a router was a much smoother process. When it comes to a FOSS-friendly router that offers great performance and an easy GUI for my parents to use, I didn’t consider anything other than the GL.iNET Flint 3. It has a 2.5 Gbps WAN port, making it suitable for future expansion, and it supports Multi-Link Operation (MLO); however, since most of our user devices don’t support Wi‑Fi 7, I did not enable this.
The out-of-the-box setup was very quick. The only thing I needed to do was set up a guest network for any untrustworthy devices.
Wireless Access Point (WAP) #
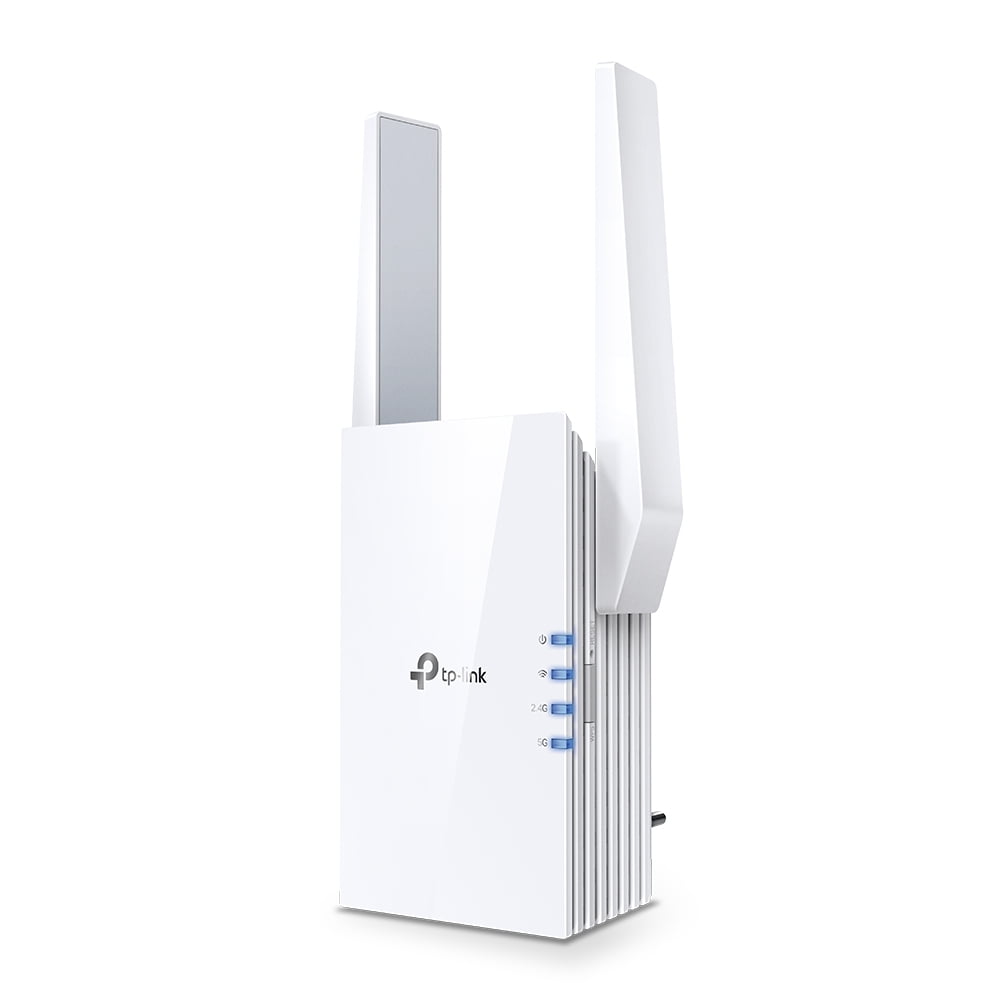
I repurposed the aforementioned wireless extender to be a wireless access point. Since it was a TP-Link device, it can be switched to AP Mode. It requires a physical cable connection, but other than that, it works great.
Home Phone #
One of the trickiest parts of helping my parents modernize their home network was dealing with the old landline. It was tied to their long-time phone number, which was used for several purposes, and they liked having a stationary phone for listening to voicemails. But with rising costs, I decided to switch them to Voice over IP (VoIP).
Port Number #
First, we transferred the existing landline number to VoIP.ms:
This process usually takes a few weeks to complete. While waiting for the port, we ordered the VoIP Phone.
VoIP Phone #
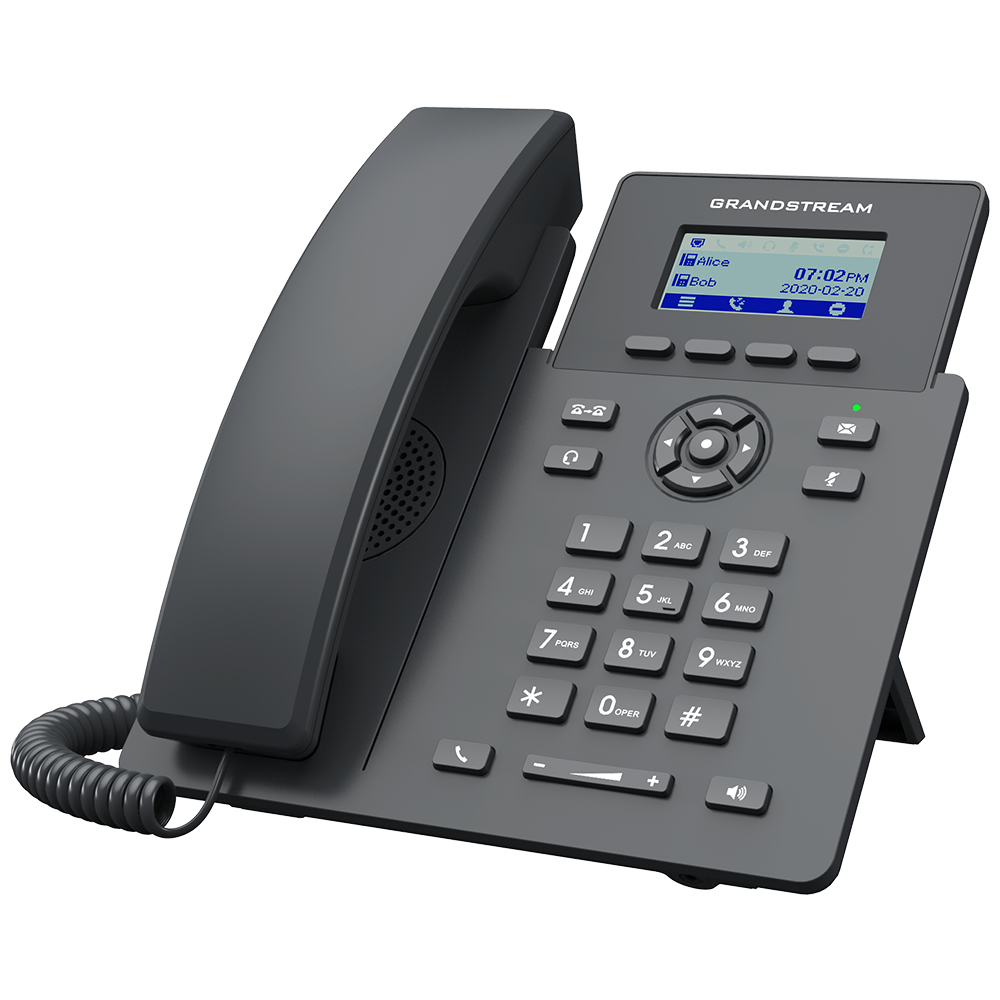
VoIP phones look just like standard home phones, but instead of connecting to the phone line, they connect to the Internet using the Session Initiation Protocol (SIP). There are many types of VoIP phones, but we chose the GRP2602G.
Once the number port was completed, it was time to configure everything:
- First, we added voicemail capabilities in VoIP.ms.
- Then we set up the Grandstream phone.
- Accessed the phone’s web interface (by entering its IP address in a browser) and input the SIP credentials from VoIP.ms.
- Adjusted any other desired settings for the IP phone.
The Grandstream phone was up and running almost immediately. It could send/receive calls and store voicemail at a fraction of the cost of a landline, ~$8/month.
TV #
If it were up to me, we’d have no cable channels at all, but my parents weren’t quite ready to cut the cord. Since I wanted to avoid renting any equipment from Xfinity, the X1 box was out of the question. Xfinity offers the Xfinity Stream app, so any device that supports it could access their channels.
The third-party options were:
I didn’t love any of these options, but they were the only ones that fit the bill.
Roku #
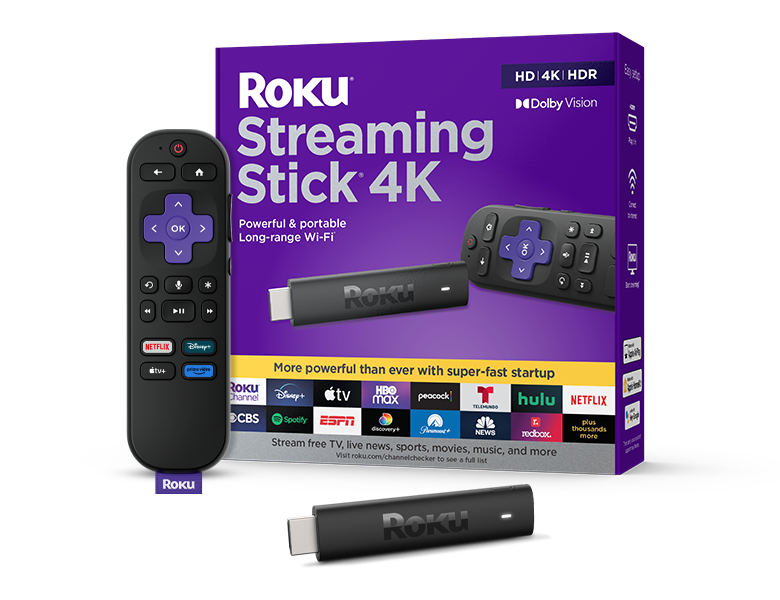
I bought a Roku streaming stick, but in retrospect, it probably would have been better to get either the Amazon or Xumo option to avoid creating yet another account—they already have an Amazon account, and Xumo is a Comcast product.
During the Roku account creation process, it asks for payment information, but you can skip this by adding nocc to the end of the signup link.
Once the stick was set up, I connected it to the aforementioned guest network.
Conclusion #
And that’s it! It was a lot of trial and error—especially with the modems—but I’m really happy with how everything turned out. Wired speeds from the router now hit over 900 Mbps down and ~70 Mbps up. In the former deadzone, speeds reach about 400 Mbps down and 35 Mbps up—roughly a 3,200% improvement in download and a 1,650% increase in upload speed.