Network Diagrams #
Once you begin expanding your homelab, things can get complicated quickly. Keeping an up-to-date network diagram helps maintain clarity. FossFLOW is a great tool to get started with.
Router #
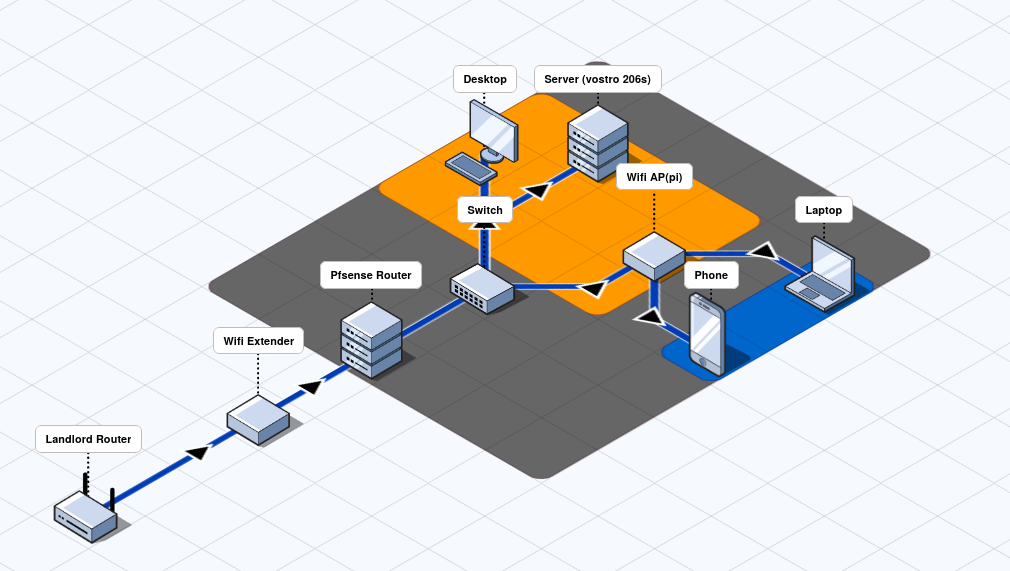
As described earlier, my original router was a netbook running pfSense, that was wired directly to the landlord’s router. For WiFi, I just connected straight to the landlord’s router.
When I moved, there was no physical router to plug into, only an open WiFi hotspot with no password or encryption. To add a layer of protection, I connected a WiFi extender to the landlord’s open hotspot, then ran an Ethernet cable from the extender to my pfSense router so all of my devices would be behind my own firewall. This would then connect to my Pi 5 running RaspAP to connect my mobile devices. However, this setup was more complex and added a lot of overhead, which meant slower speeds, higher latency, and longer downtime whenever there was an outage.
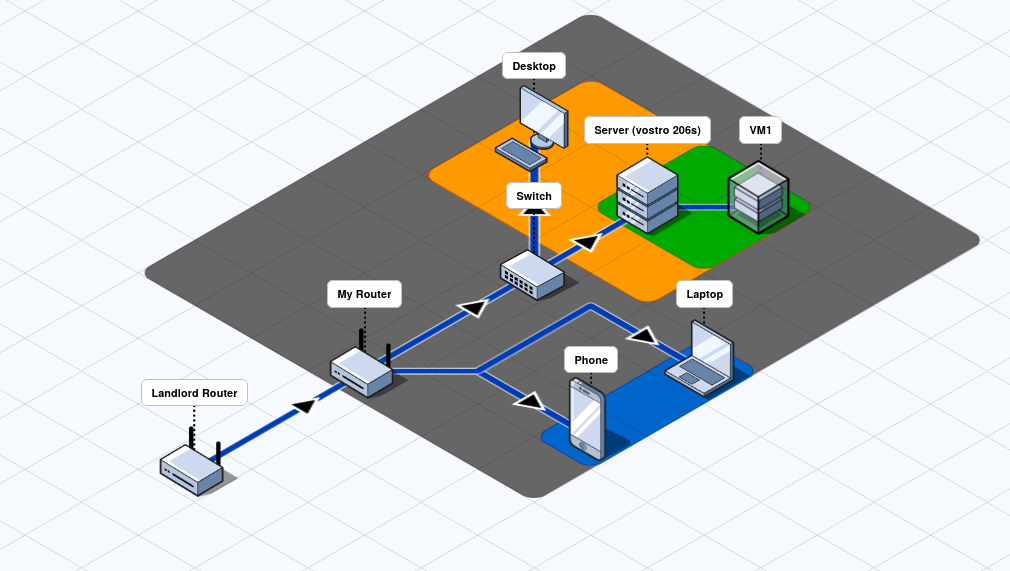
I switched to GL.iNet’s Beryl AX travel router. It’s portable, cheap—and most importantly—it has a WiFi repeater mode that connects wirelessly downstream from any existing router or wireless access point (WAP), without needing an Ethernet cable. It can create a WiFi network with its other antenna which allows me to connect my mobile devices.
It runs its own proprietary OS built on OpenWRT, but you can flash stock OpenWRT onto it. I have yet to do that.
DHCP #
Dynamic Host Configuration Protocol (DHCP) is a standard network protocol used to automate the process of assigning IP addresses and other configuration details to devices within a network. Without DHCP, network administrators would have to configure each device manually—a time—consuming and error-prone task. DHCP streamlines this by dynamically distributing network configuration information, ensuring efficient and scalable network management.
— efficient IP
When your router’s DHCP service assigns an IP address, it selects one dynamically from a permitted range. This means the address a device receives can change over time as it reconnects to the network. For server management, it is often easier to configure a static IP—an address reserved for a specific device based on its unique MAC address—to ensure consistent access and easier management.
Switch #
I use a simple unmanaged NETGEAR switch to manage the wired connections downstream of the router.
VPN #
To access your hosted services from outside your home network, you need port forwarding or a VPN. Given that my setup had two routers between me and the public internet I would need admin access to the landlord’s router in order to port forward. That would not be feasible, so my only option was a VPN.
There are two main types of VPNs: hub-and-spoke networks and mesh networks. Traditional VPNs like OpenVPN follow the hub-and-spoke model and require a public IP, so that was not an option.
The solution was the mesh network VPN, Tailscale. Mesh VPNs do require a public IP for their coordination server, but Tailscale provides access to theirs for free.
Eventually I want to try a self-hosted option with Headscale or just use plain WireGuard, but Tailscale was the easiest to start with.
GL.iNET #
While the router I’m using does have a beta Tailscale integration in settings that can be turned on, it is not automatically updated, nor can it be updated manually from the Tailscale admin panel. This not ideal in terms of security. I use an updater script whenever I need to update the version.
Servers #
Hardware #
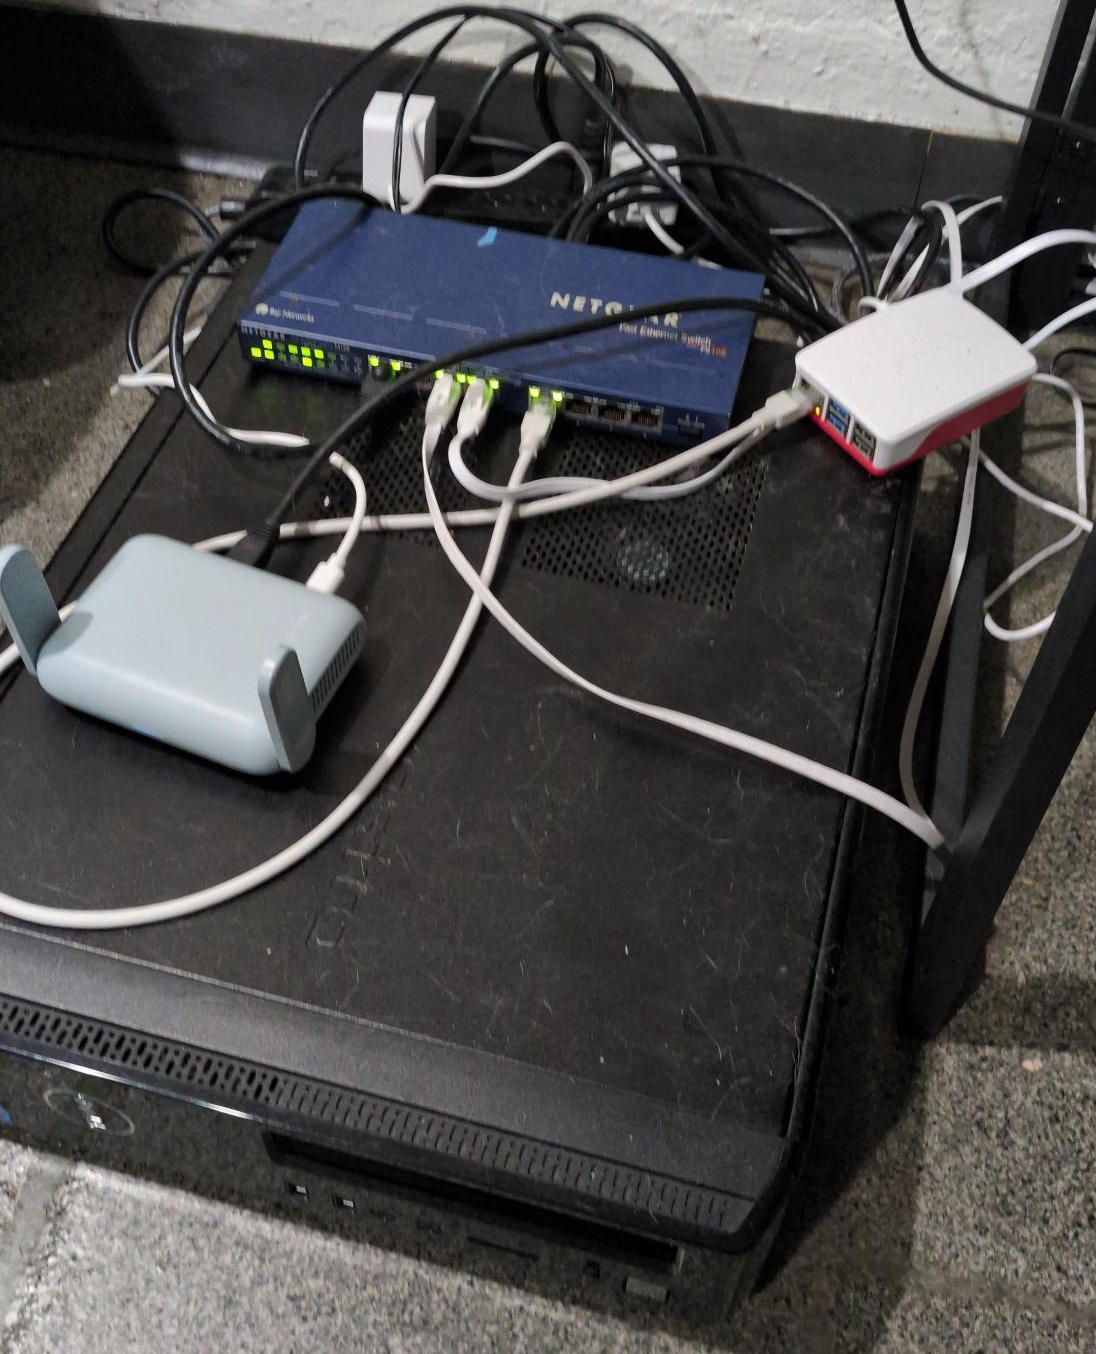
I used a Vostro 260s as my main server—the names in the diagrams are a typo. I would have also used the Pi; however, that was requisitioned for a different project once it was retired as a WAP.
Outages #
Unlike the Pi, the Vostro box does not restart after a power outage—it must be rebooted manually. This behavior can be changed by tweaking the AC Recovery settings in the Basic Input/Output System (BIOS).
I haven’t adjusted the AC recovery settings yet, so for now I rely on Wake-on-LAN (WoL). This feature is usually enabled by default on many machines, but if it’s not, you can turn it on in the BIOS.
- First I’ll use Secure Shell Protocol (SSH) to remotely access my router, and install etherwake:
opkg install etherwake
- And then send a wake command to the Vostro box:
etherwake -i br-lan <MAC_ADDRESS>
- After which I’ll ssh into the Vostro box:
ssh user@IP
- And enable xconsole:
xconsole
- And follow the prompts to restart the VM.